- Bluetooth pair the CS20 to the GS receiver. Turn the GS receiver and controller on and from the main CS20 screen go to Fn Instrument and select "Use GS only".
- Go to Settings/Connections and GS Connection Wizard and select your GS sensor then click Next.
- Tick Bluetooth and click Next, then click Next again and it should search for the receiver. Once found, highlight the receiver and click OK or Finish. The receiver should now be connected at the top of the screen. Now the controller should be able to talk with the TS16 via LR and the GS sensor via Bluetooth.
- Back in the main CS20 screen now select Fn Instrument and Use both GS & TS, first measure with TS Instrument.
You may need to edit your Working Style but you may load and use the GPS TPS Demo attached. It's one that we have used for this purpose. Copy it to your Config folder on the SD card and then load this from Settings/Tools/Transfer User objects. - Now set the Total Station up and add the prism and GNSS receiver to the pole.
- Create a new job and you will need to select a coordinate system as normal as you are doing GNSS measurements plus select TS Scale 1.00000. Both devices should be connected now. The TS should be connected at the top of the screen.
- Navigate to the Set Up menu and select Resection. Enter the details of your TS point. Now you are ready to measure your first point and you will see a few different icons at the bottom of the screen as per the image below.
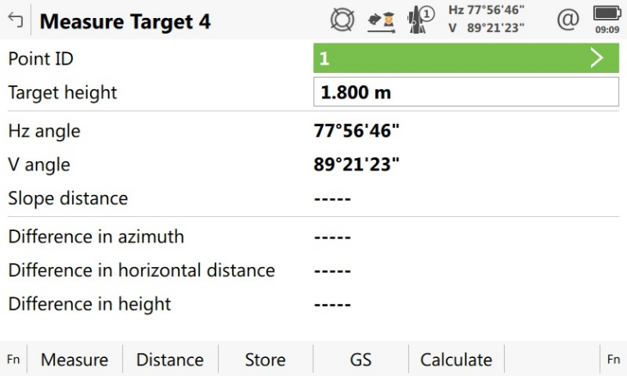
- Set your Target Height based on the prism. Example: if the pole is set for 1.8 it will be 1.8 for the prism. The software will add the difference when measuring with the GNSS receiver.
- Go to your first resection point and do a Powersearch if TS is not locked, then press GS button at bottom of the screen and measure the point with GPS and code it. The antenna height will change to 1.859 or similar. Once the point has stored and measured with GPS you are now ready to measure with the TS. Press "measure".
- Continue to do this with your other resection points and then hit calculate when you have measured enough. There are residual tabs and results so that you can verify how good your resection is.
Note: if your points are close to the TS then you will get some errors as the GNSS positions have 1-2cm in them. - Once the resection is done you can then carry on with your job and switch between which sensor you want to measure with at any stage by clicking on the battery icon and switching. Note: you can also set up a hotkey to switch between.