- Open Leica Infinity software and select Tools then Code Tables.
- Select the NEW icon and then New Table will be highlighted, you can now name your new Codelist by overwriting New Table. You can also add details in the description column and the creator.
- Once this is done select the pencil icon to Edit your Code table and the Code Manager box will appear as per below.
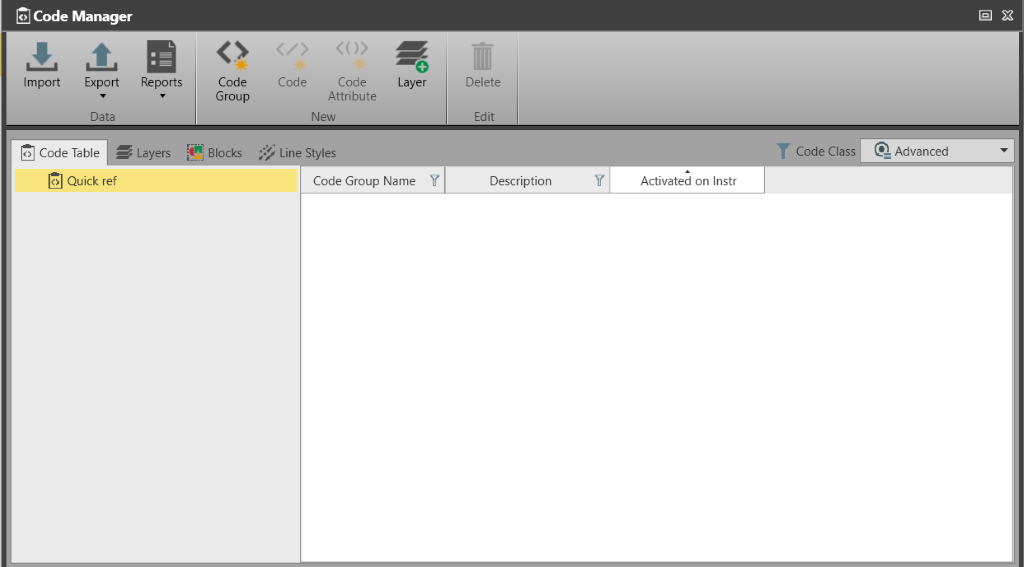
Now we are ready to start entering codes. - For Smartworx and Captivate select Advanced as the Code Class which is in the top right hand corner, all other instrument types choose Basic.
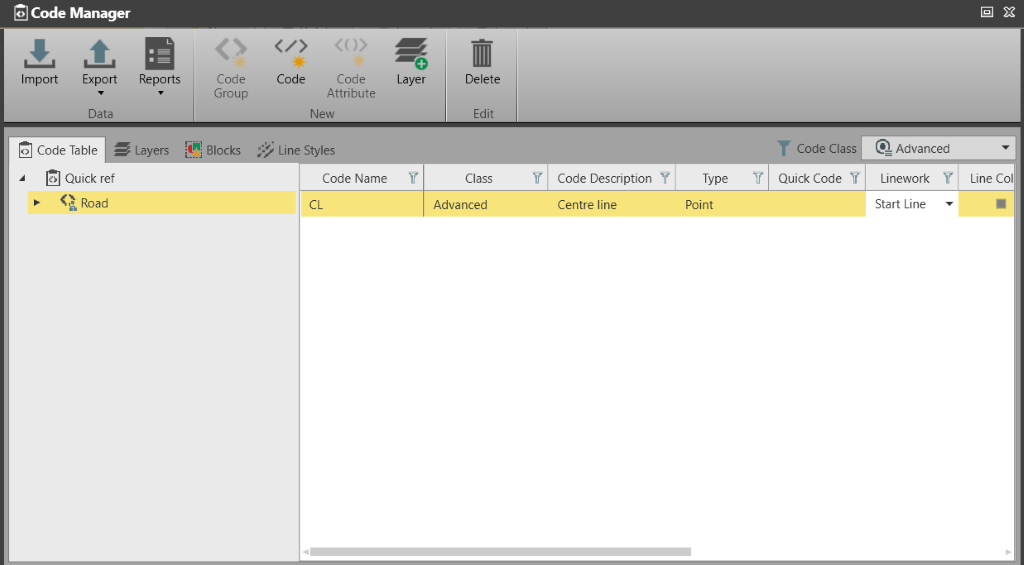
Its best to create different Code groups such as Road, Survey, Utilities etc so that codes can be grouped according. Grouping flows through to Smartworx Viva, or Captivate to help manage code list on board the instrument. - Select Code Group and then name the group accordingly. Make sure the button Activated on Instrument is ticked on.
- Once you have a Code Group or multiple Code Groups select the one where you want to create a Code by highlighting the Group then the CODE icon (Ribbon Menu) becomes active in the top menu select this and write your code.
- Now you are ready to add the specific fields applicable to this code. Below is the code CL description Centre line and it’s a LINE code as we selected Start Line. Just select POINT as the TYPE on all codes it’s the Start Line or NONE that determines if the code is Line or Point.
- Now we can add an Attribute so highlight then select the arrow beside your Code Group and it will open up a list of all codes in that Group, now select the code that you want to add an attribute to. You will see the icon Code Attribute (Ribbon Menu) become active - select this then you can name your attribute.
The Attribute type has 3 options which affect the point storage on the instrument
- Normal – Optional to complete before point stored
- Mandatory – Must be completed before point stored
- Fixed – The attribute entered into the code list will be stored with the point
The Value option will depend on whether you need to input text or just a number.
- Text – Is a free select of alpha numeric values
- Integer – will only accept whole numbers (How many wires on the fence)
- Real – will accept floating point numbers. (This is the best option for a manhole depth for example)
It is entirely up to you whether you set up layers, line styles, colour etc as this only changes how the lines etc are drawn up within the Captivate field controller. If you are using 12D then your Map file will control all of this on import to 12D. - Once completed you can select Export then select SmartWorx/Captivate-DBX.
- Once saved you will see that there are 3 files with the same name but different extensions xo6, x23, xcf - copy these files into the Code folder on SD Card or USB stick then insert into Controller and go to Settings/Tools/Transfer user objects and object to transfer is Codelist from either SD Card or USB.
Codelists can be edited or added to whilst in use in the field by selecting Job/View and Edit Job Properties then select the Codelist tab then Codes. This brings up New and Edit however you are just making changes to the Codelist within this Job not the original Code list, in order to do this you would need to edit the Codelist within Infinity.