This guide has the following information:
[A] How to request data from your designers for Leica iCON 3D[B] How to prepare a USB drive to transfer files to Leica iCON 3D
[C] How to Import files from a USB drive to Leica iCON 3D
[D] How to change Project on Leica iCON 3D.
[E] How to set a Coordinate System in Leica iCON 3D (Uploaded with project)
[F] How to set a Coordinate System in Leica iCON 3D (Standard/Predefined)
[G] How to add Reference and Help Models in Leica iCON 3D.
[A] How to request data from your designers for Leica iCON 3D
Request the following from your designers:
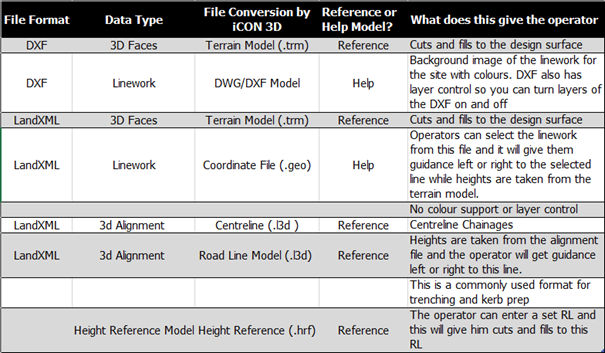
- A 3D DXF or LandXML file containing …
- The Linework for the project (Please only include the layers that are relevant for construction).
- The Design Surface as 3D Faces.
- A .csv file of the Survey Control for the project
- Confirmation of the Coordinated System and Vertical Datum used for the project. (e.g. Mt Pleasant 2000 with Lyttleton `37 Heights)
How Data is handled in Leica iCON 3D.
[B] How to prepare a USB to transfer files to Leica iCON 3D
- Insert USB stick into your computer.
- Create a new folder on the USB named “in”
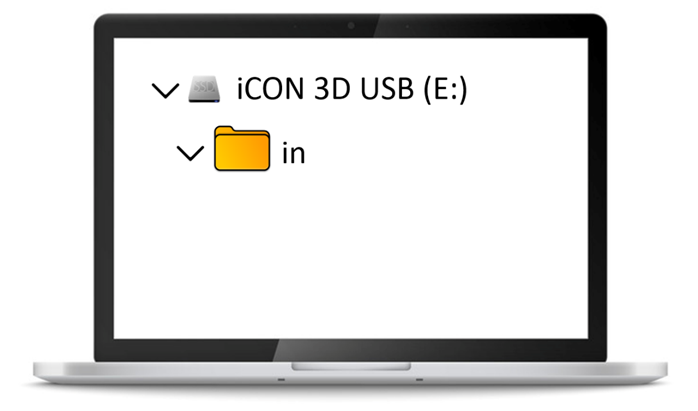
- Create a subfolder inside the “in” folder and name it the same as your job site. (e.g. ShowGrounds)
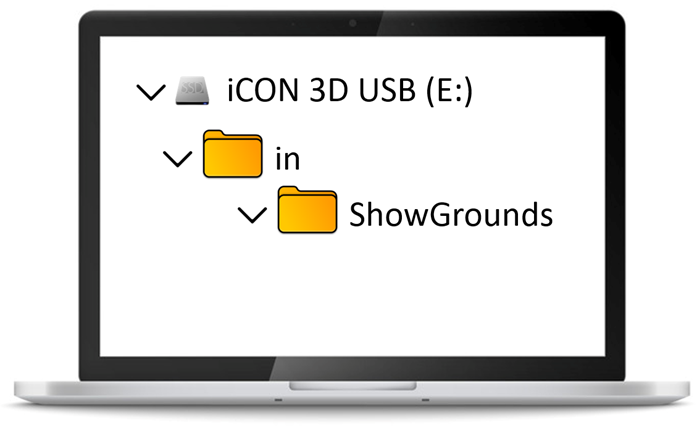
- Place all your data files inside the subfolder (ShowGrounds).
(iCON 3D will create a project using the subfolder name.)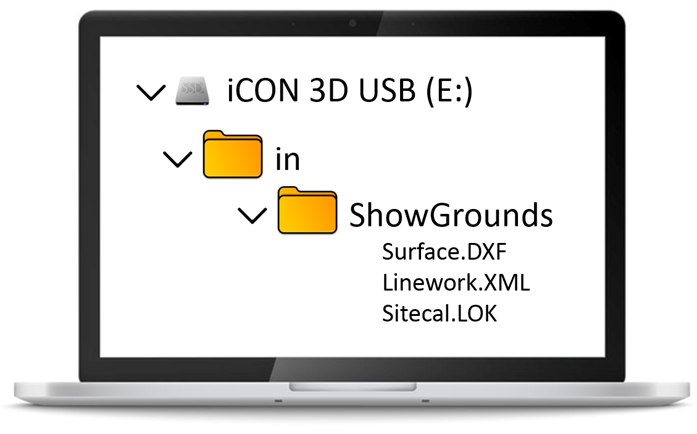
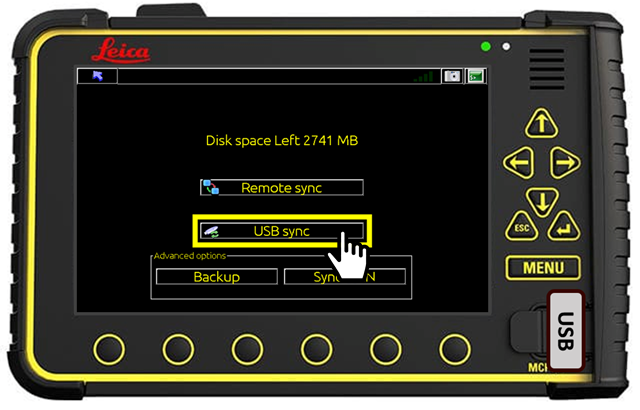
[C] How to import files from the USB drive to Leica iCON 3D
- Insert the USB into the control panel.

- From the Home page Tap Tools.
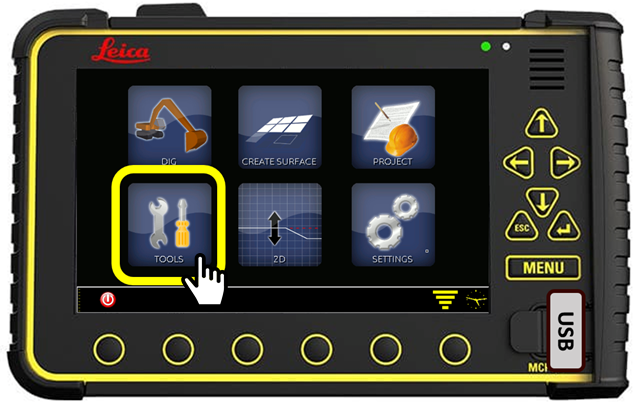
- Tap on Data transfer.
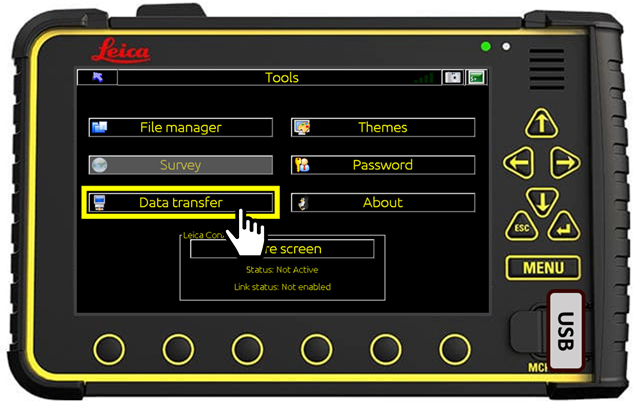
- Tap on USB sync.
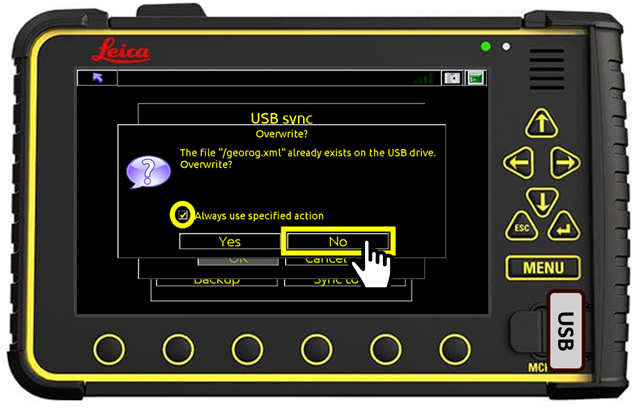
- Check Always use specified action and always tap No to any overwrite error messages. (When uploading data to iCON 3D always tap No to all error messages.)
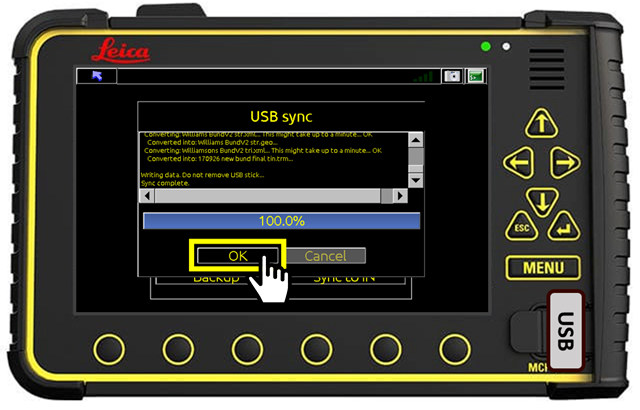
- Tap OK when at 100% (It is now safe to remove the USB).
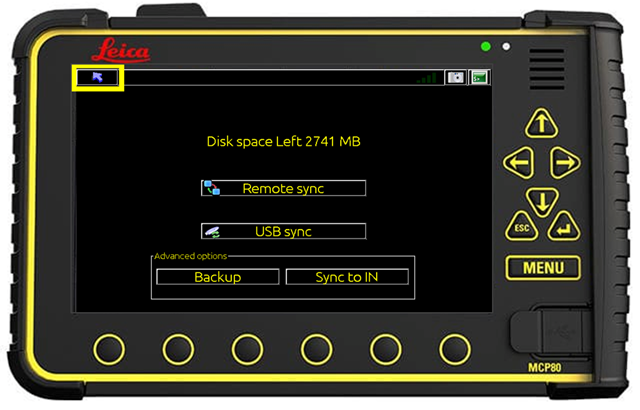
- Tap the back button twice to return to Home screen.
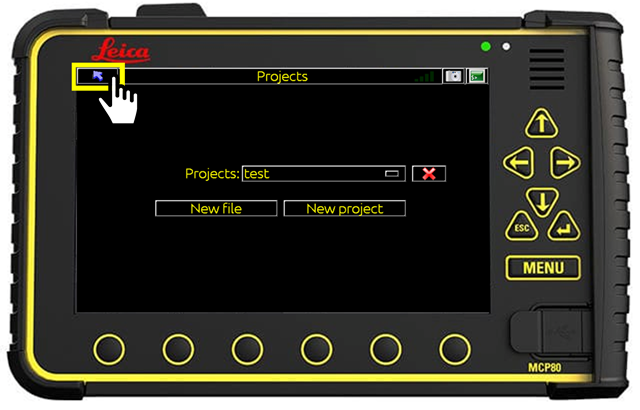
[D] How to change Project on Leica iCON 3D
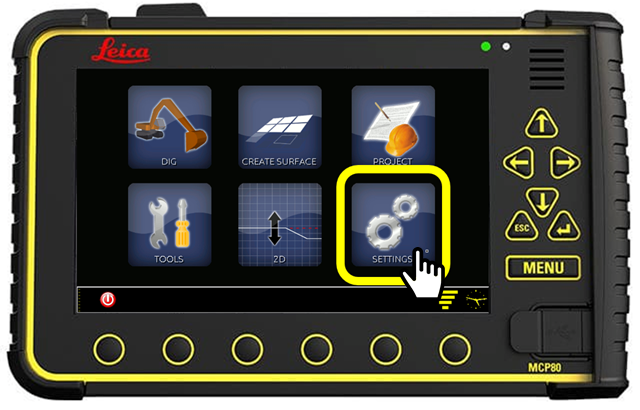
- Tap SETTINGS from Home

- Tap on Projects.
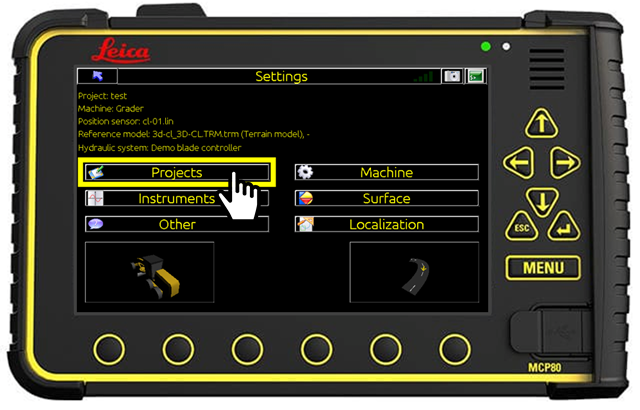
- Select your Project from the Projects dropdown.
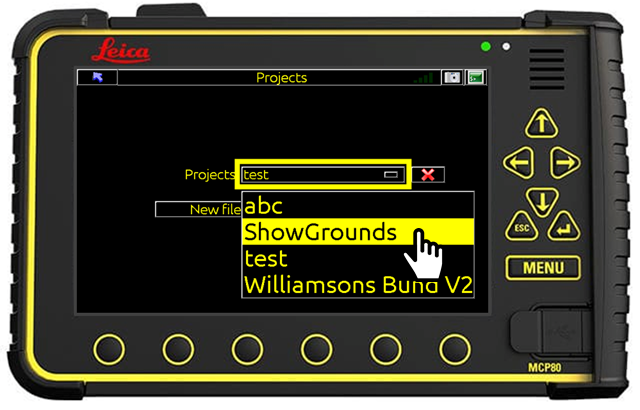
- Tap the back arrow twice to return to Home screen.
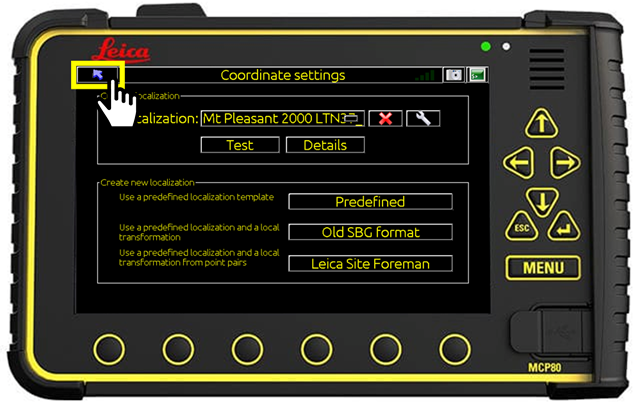
[E] How to set a Coordinate System in Leica iCON 3D
(LOK Uploaded with design files)
- Tap SETTINGS from the Home screen.

- Tap on Localization.
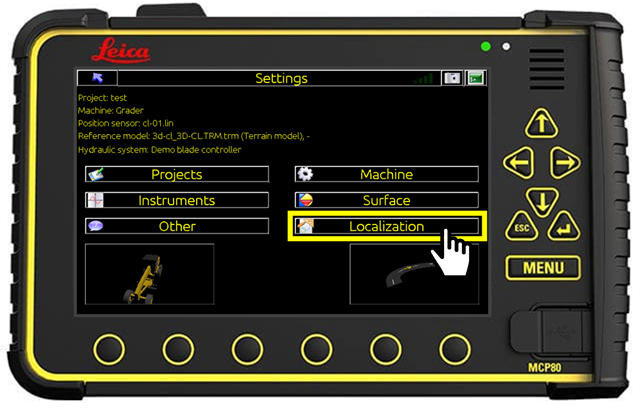
- Select the Localization from dropdown (NB: If there is more than one in the list it is good practice to delete all others in the list to avoid someone making wrong selection in future).
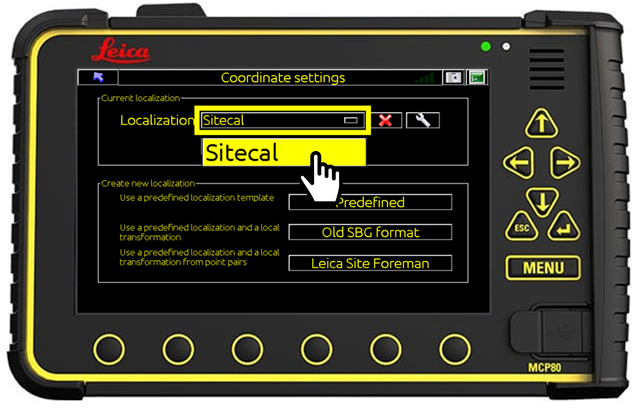
- Tap the BACK button twice to return to Home screen.

[F] How to set a Coordinate System in Leica iCON 3D.
(Selecting a standard/predefined coordinate system)
- Tap SETTINGS from the Home screen.

- Tap on Localization.
- Tap on Predefined.

- Select Country/Region from dropdown list.
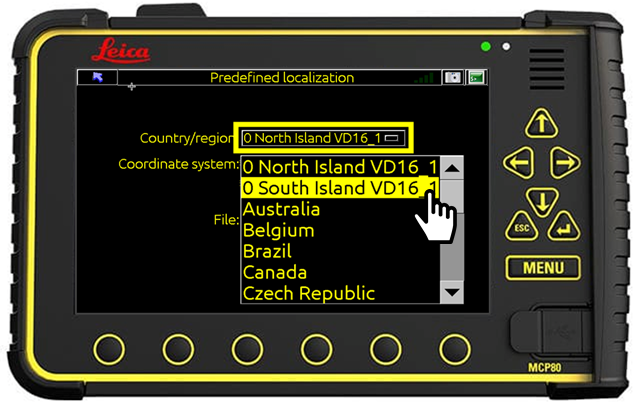
- Select Coordinate system from dropdown list.
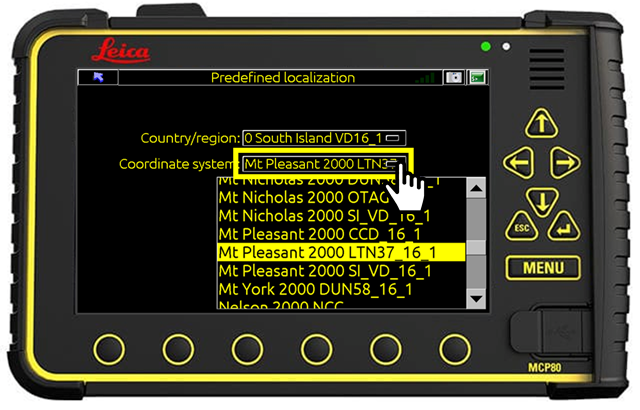
- Tap OK.

- Tap the BACK button twice to return to Home screen.
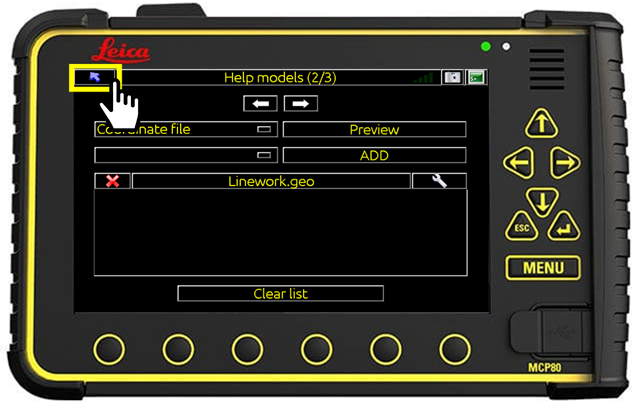
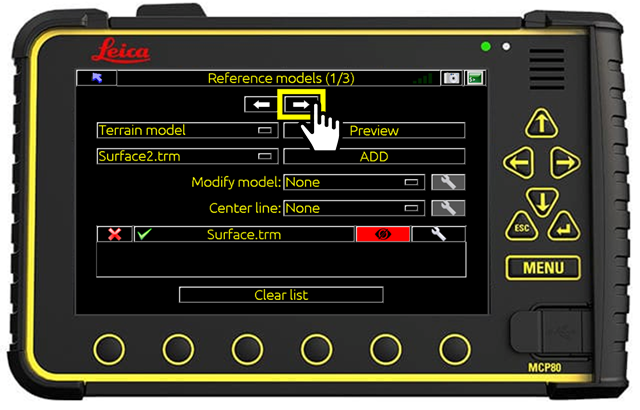
[G] How to add Reference and Help Models in Leica iCON 3D.
(Used to generate CUT/FILL Values)
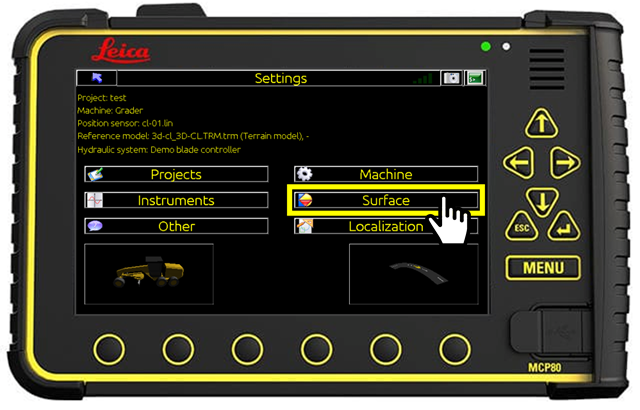
- Tap SETTINGS from the Home screen.
- Tap Surface.
- Select the file containing 3D faces from dropdown.
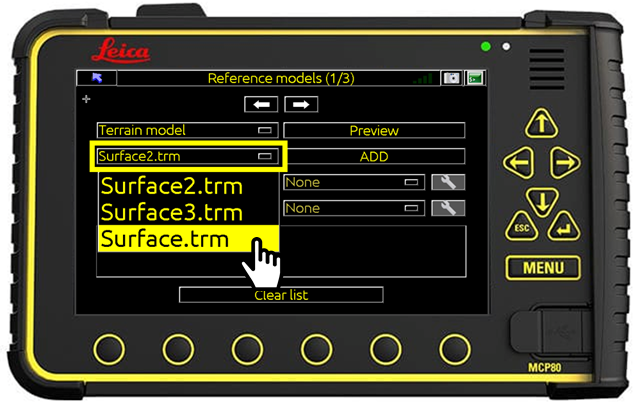
- Tap ADD to add file to list below.
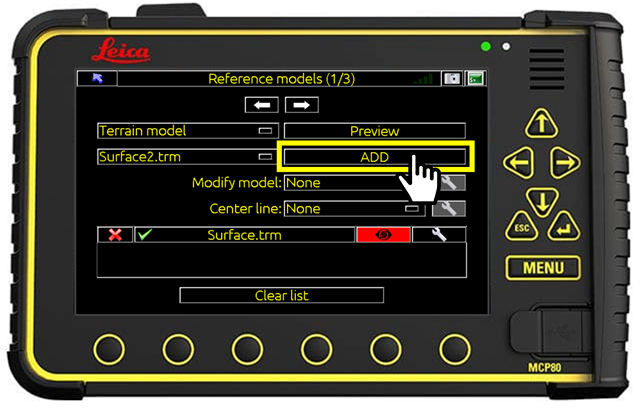
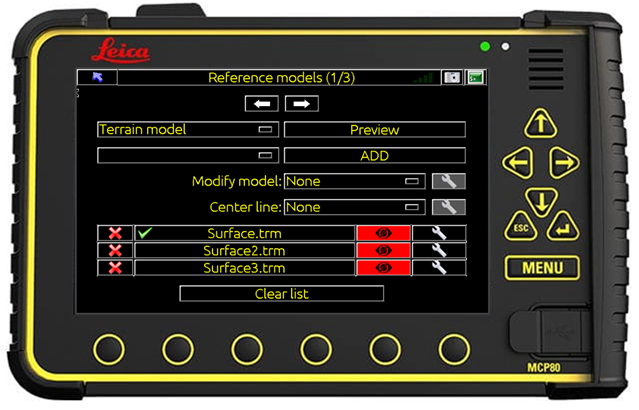
** It is possible to add multiple Reference models to the list. The file with the green tick is the active model where cuts/fills are generated from.
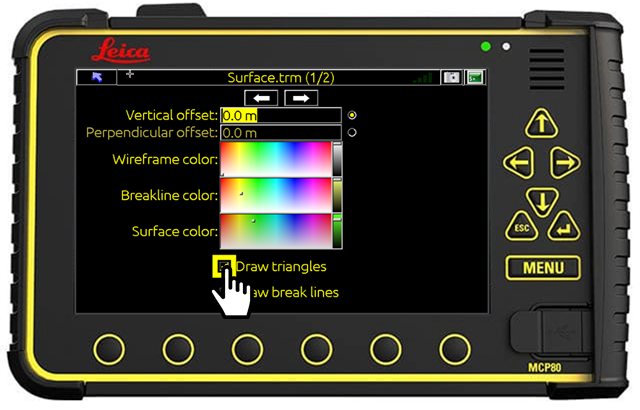
- Tap the Spanner next to the file to access the model settings menu.
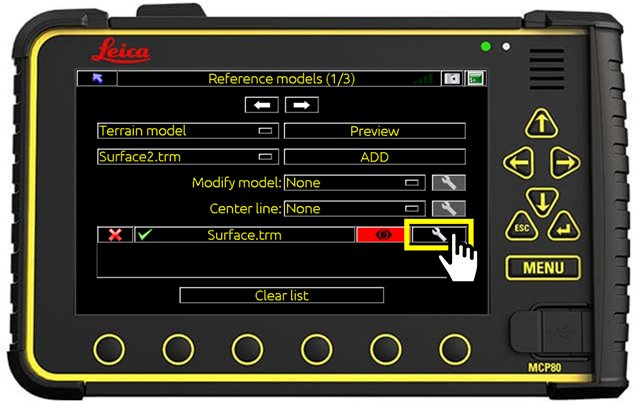
- Uncheck Draw triangles to hide triangles.
(Only do this if you have linework available to use as help model.)
- Tap the Back button.

- Tap the right arrow to access Help models page.
- Select file type from dropdown (Coordinate file to display a .geo as points/lines in background, DWG/DXF file to display .dxf/.dwg as lines in background).
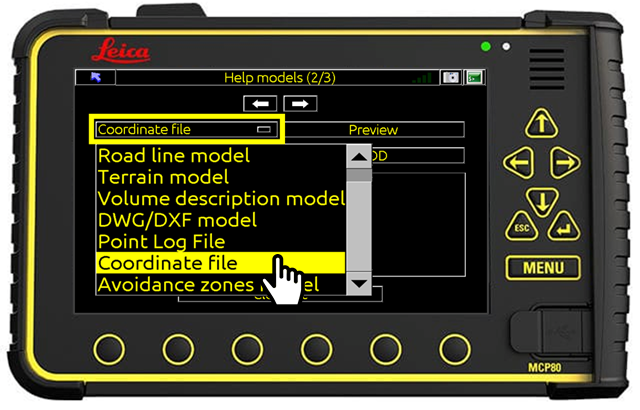
- Select the file containing line work from the dropdown.
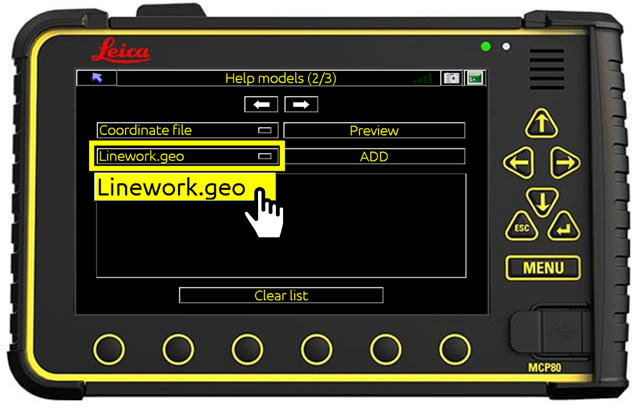
- Tap ADD to add the file to list below (It is possible to add multiple files to the list to display in background)
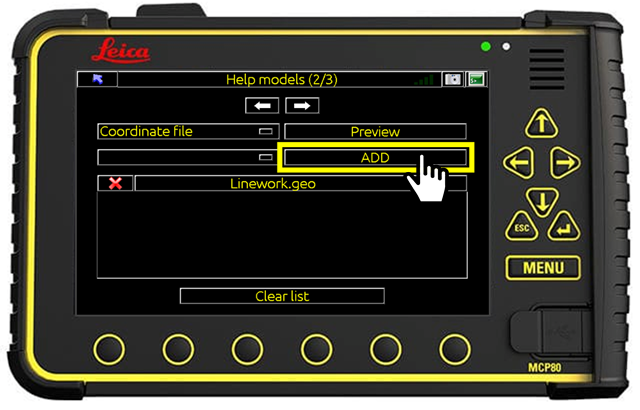
- Tap the Back button twice to return to Home Screen.