BLK2GO Field Capture tips
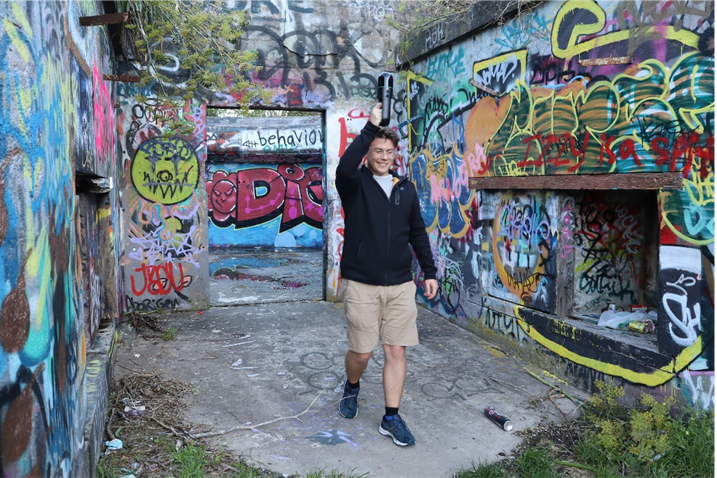
You can install the free BLK2GO Live App on your phone (iOS or Android) and you will get live feedback from the scanner including a SLAM quality indicator. The App also allows you to name your walks for easy identification at download.
After you initialize your scanner and begin your BLK2GO scan, the circle uses a color-coded system to indicate the approximate quality of the device’s SLAM. The SLAM Quality indicator uses a three-color system, thus:
- Green: SLAM quality is good.
- Yellow: SLAM quality could start to worsen. Consider slowing down or pausing your walk to see if the indicator changes back to Green. This might indicate that you were walking too quickly or that the device was struggling with surroundings that are too similar to each other.
- Orange: SLAM is struggling. Take similar steps as you would with a Yellow indicator. If the Orange colour persists, consider stopping the scan and re-evaluating the walk, your scanning techniques, and the environment.
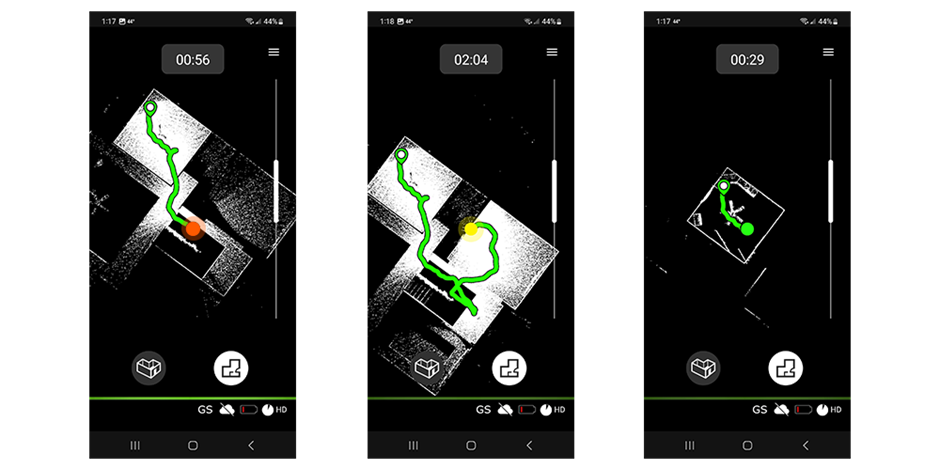
Tip: Use the Live App to review the scan data in real-time, when the slam is lost it is really easy to catch it on the app, the tracker will move really fast to nowhere.
Here are some best-practices BLK2GO tips, which ensure that you get the best possible data off the device:
- The initialisation step is very important.
- Make sure you use the table stand (must be held steady)
- Face the scanner into a good, structured environment (free of close obstructions, good structure within 10m)
- Hold it firmly in the base plate throughout the full initialisation. It should only take 10-15 seconds for the LED band to go green, I like to leave it another 10s with it green before I pick it up and start moving
- What is important to know is that the device has a IMU sudden movements could "confuse" the sensors causing loss of the slam. The more smoothly you can move the scanner, the better results you will get
- Slow and smooth changes of direction are best, avoid abrupt changes in direction
- Keep it held nice and high so it can see back where you've been over your shoulder (helps with the SLAM)
- The fewer features the BLK can't "see" the more difficult is to do a correct slam calculation, so try and keep it facing nearby structures.
- ALWAYS keep in mind the BLK2GO needs to have as much as possible FOV during the initialization. If you need to transition around corners, through gates/doors/tight spaces then walking sideways (crabbing) helps.
- Take note of how it is recommended to pause for 5 sec at changes in direction
- Return to the base-plate at the completion of a scan if possible
- This gives you a visual check on the trajectory (you should see your position return to the start point in the App)
- Keep your walks small to lower the risk of the SLAM slipping during capture. I recommend 10-15min walks.
- Multiple walks of the same area are a great check on the trajectory (can be joined using cloud-to-cloud overlap)
- If you’re using Black and White Targets, walk around the targets at a distance of 2 meters. Ideally, stop for 1-2 seconds in front of each target (pointing with the front camera to the target). Targets needs to appear on the images and point cloud.
- A minimum of 3 common targets is needed to join two walks with targets only
- Great video of the workflow here.
Downloading the Data
- Download and install the BLK Data Manager (license free).
- Plug the BLK2GO into your PC using the USB cable (port is under the battery compartment)
- Once powered up, open the BLK Data Manager, select the BLK2GO tab and click the Connect
- If the BLK Data Manager is opened before the BLK2GO scanner is turned on, then click the Re-Scan Button.
- Select the Walks to download and click the Download button to select a location on disk for the *.b2g file. Click the Select button in the browse dialog to begin the download process.
If you have any issues with Data Manager, you can connect via wifi and open a web browser and type http://10.1.1.1/. Scans can be downloaded via the Scans tab of the web interface.
Importing the Data into Register 360
- Download the latest Register 360 here (note we currently recommend v2022.1.1).
- Open Register 360, then the Settings menu
- IMPORTANT - Check the following 2 settings are enabled in the General tab

- IMPORTANT - Check the following 2 settings are enabled in the General tab
- Create a project and drag the .b2g files into the “Import” area
- Select the “Auto B&W Target” registration option if targets are in the scene
- Otherwise leave the registration options blank
- A filter level can be set if you want to decimate the data (lighten it up). ‘Low’ density is a more aggressive filter
- Waypoint interval is how often you would like a panoramic image extracted along the walk
- If you only need the point cloud (and no images) then set this to something high (like 250m)
- Click “Import”
- Walks can be joined with cloud-to-cloud by multi-selecting a waypoint from 2 walks and entering a ‘visual alignment’ (same as static scans)
- If targets need to be checked/added, then this is done by entering a “setup cloud” and using the target menu
Reach out to our team for help at support@globalsurvey.co.nz